
How to Go From Zero to a Deployed App With Codex
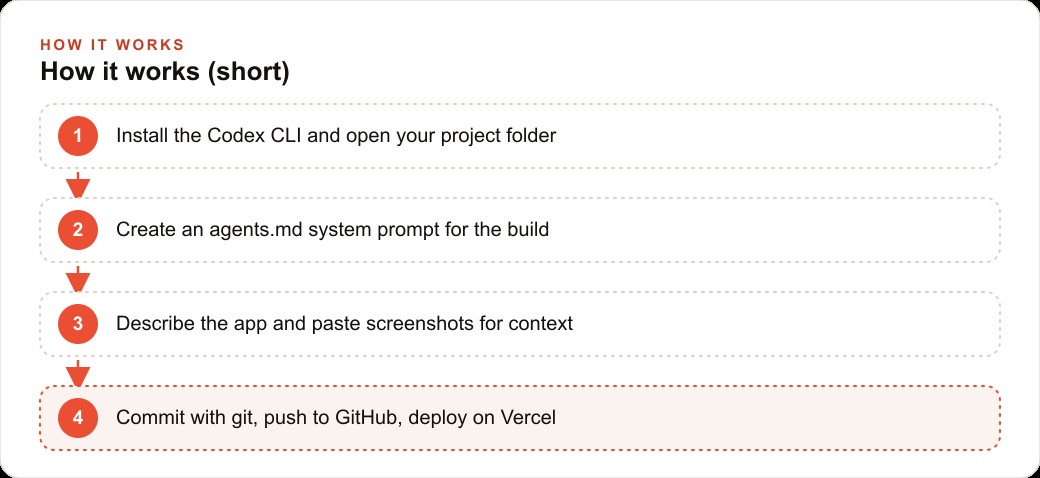
Install the Codex CLI with one command, start with an agents.md system prompt, describe the app in plain English while pasting screenshots for context, use git from the first commit, then push to GitHub and deploy on Vercel, taking a complete beginner from nothing to a live web app in under an hour.

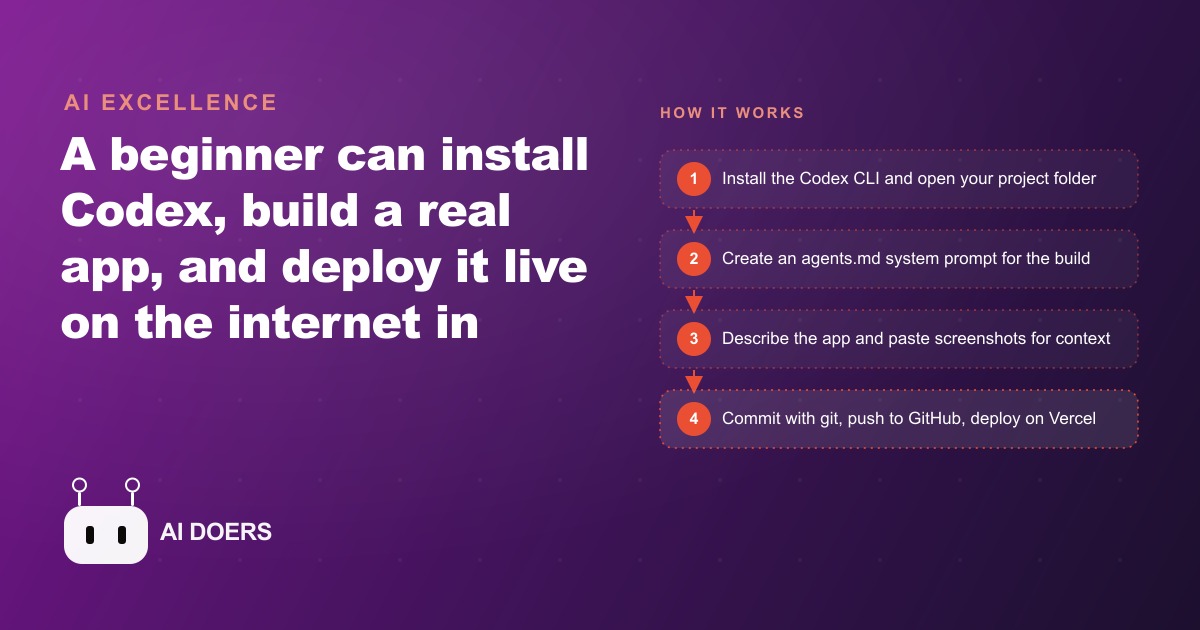
OpenAI's Codex CLI just collapsed the distance between having no technical background and having a live web application running on the internet, and the workflow that makes this possible is specific enough that understanding it changes how a business owner thinks about what software projects are now actually within reach.
I am Madhuranjan Kumar, and the promise here is not just generating code. It is shipping something real: a deployed web app with a public URL, version-controlled, updatable, and usable by anyone with a browser. A complete beginner can go from install to live app in under an hour if they follow the right sequence. Skip the setup steps, and the same tool produces a confusing pile of generated files that does not quite work. The sequence is the method.
One Command Installs the Entire Tool and Two Commands Are All You Need to Navigate
The Codex CLI installs with a single line in your terminal. That is not a simplification. It is the complete installation process. A beginner who has never touched a terminal can open it, paste the install command, and have the tool running in under five minutes.
After installation, you need exactly two terminal commands to operate throughout the entire workflow: ls to list the files in a directory, and cd to move into a specific project folder. Those two commands are all the terminal knowledge required. The course that demonstrated going from nothing to a deployed app covered nothing beyond those two commands before building and shipping a complete application.
This matters because the terminal has historically been the first point of failure for non-technical builders. Tools that required environment configuration, dependency resolution, and troubleshooting a setup that varied by operating system lost most of their audience before any building started. The single-line install with a two-command operational vocabulary is a genuine accessibility shift.
Four interfaces are available for running Codex: the CLI in your terminal, an IDE extension, the integrated terminal inside Cursor or VS Code, and a standalone Codex app. All four connect to the same account, share the same sessions, and produce the same quality of output. The CLI is the right starting point for a beginner because it installs once and works in any project folder without additional configuration.
The model choice makes a significant difference. Using a mini or lite version of the model to conserve costs produces noticeably weaker output on anything beyond the simplest tasks. The right choice is the latest model, GPT 5.4 at the time of recording, with reasoning effort set to high for most work and extra high reserved for deep bugs or complex refactors where the additional thinking time is worth the slower response. This is a small settings decision with an outsized effect on what you get out.
agents.md Has Become the Standard System Prompt Across More Than 60,000 Projects
Before writing any feature, before describing the app, the first file to create in your project folder is agents.md. This file is the system prompt that every agent running inside the project follows across every session. It describes what you are building, what conventions to use, what the app should and should not do, and any constraints on the technology choices.
The agents.md convention is not something Codex invented for its own use. It is a shared standard adopted across more than 60,000 open source projects on GitHub, and it is read automatically by Cursor, Windsurf, Gemini CLI, and Codex. When you write one agents.md, you are writing a document that works across every major coding agent, not just the one you started with. That portability means your project context travels with you if you change tools.
The quality of the agents.md directly determines the quality of what the agent produces. A weak agents.md with vague goals generates generic output that does not quite match what you imagined. A clear, specific agents.md that names the business, describes the main function of the tool, specifies the technology stack, notes any integration points like a calendar system or payment provider, and describes the visual style, produces output that is tight and purposeful from the first generation.
A good agents.md for a small business web tool is six to ten sentences. Writing it before any feature prompting is the discipline that separates builders who consistently get results from beginners who get inconsistent ones.
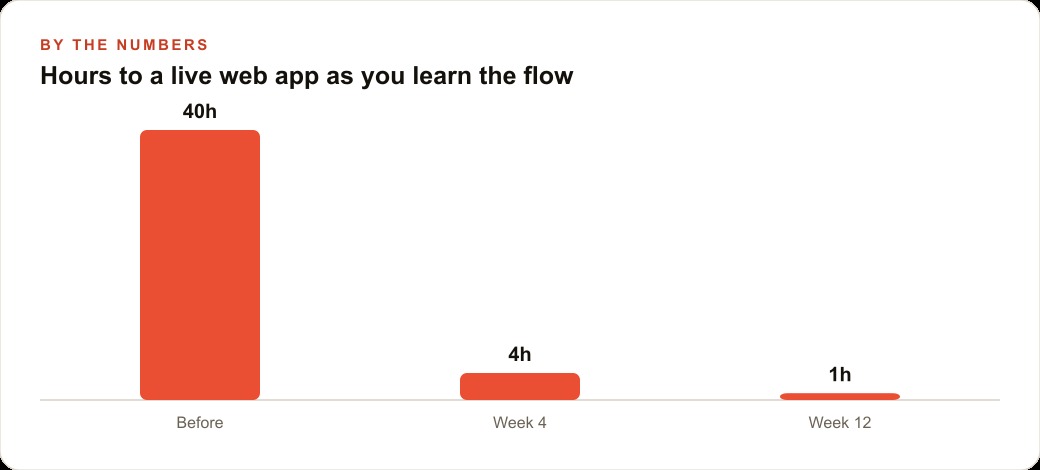
Image Input Lets You Show What You Mean Instead of Describing It
One of the most underused capabilities of Codex, despite being available on any computer, is image input. You paste a screenshot directly into the terminal with Ctrl+V and the agent reads it as part of the prompt. This capability changes what it is possible to communicate precisely.
Some things are easy to describe in words: a button that submits a form, a list that filters on a dropdown selection. Other things are genuinely difficult to describe accurately: a card layout with a particular spacing and visual hierarchy, a table that looks exactly like a specific software interface, a design reference from a product the builder admires. For those cases, a screenshot is far faster and more precise than a written description. The agent sees the layout and replicates it, rather than interpreting a description that might mean something different to the human writing it than to the model processing it.
The same applies to errors. Instead of copying a long stack trace into the prompt as text, paste a screenshot of the error. The agent sees the exact error in its context, often including the surrounding interface state that helps it understand which part of the application produced the failure. Error resolution through image input is faster and produces more accurate fixes than error resolution through text description because the agent has the complete picture rather than a partial one.
For a beginner, this tool shifts the starting position from trying to describe something precisely in words to simply showing the thing. That concreteness produces tighter output from the first generation and avoids the multiple rounds of clarification that vague descriptions require.
Web Search Lets the Agent Work With Current Documentation Rather Than Training Data
AI models have a training cutoff. Framework updates from three months ago, API endpoint changes from last quarter, current pricing tiers for a third-party integration you want to add: none of those are reliably inside the model's training data. Instructing Codex to use its web search tool for current facts changes what it can accurately work with during the build.
In a practical build, web search is most valuable for external integrations. If the app needs to connect to a payment provider, a booking system, a maps service, or any third-party API, the agent can search the current documentation and build against the live version rather than potentially outdated training data. For business apps that need real integrations with external services, this is the difference between code that actually connects to the service and code that generates plausible-looking requests against an API structure that changed six months ago.
Web search also matters for content-heavy tools. If the app displays real information, such as current industry figures, regulatory procedures, or service specifications, the agent should search rather than generate from training. Getting those details wrong in a customer-facing tool creates credibility problems that show up immediately when users interact with the application.
One-Shot Hundreds of Lines, Fix Errors by Pasting Them Back in the Same Session
With a clear agents.md, the right model and reasoning effort, and good image or web search context for the integration points, Codex can generate hundreds of lines of a working web application in a single turn. That is not guaranteed and it requires the setup to be right, but when the context is clean and specific, the agent produces a working first version of a complete feature without intervention.
When errors appear, and they will on any build of real size, the workflow is simple: paste the error screenshot back to the same agent in the same session. The agent already holds the full context of what it built, which means it can trace the error to the specific decision it made and fix it with that context rather than starting from scratch. The same session memory that produced the feature fixes the feature when the feature breaks.
The git convention is the resilience layer that makes this workflow safe. Initialize a git repository in the project folder before the first generation and commit every ten to fifteen minutes while building. Git is for version control, not for collaboration or sharing. The agent might make a strong decision in one turn and a poor one in the next. Without version control, recovery from a bad generation is memory and manual reversal. With version control, you roll back to the last working commit and try again. GitHub is where the repository goes when the app is ready to deploy, but git starts locally and starts before the first line of code is written.
A Wedding Stationery Studio Building a Quote Calculator and Design Upload Tool
Here is the complete workflow applied to a specific example. A wedding stationery studio wants a tool on their website where a couple can configure a custom order: choose invitation type, quantity, paper weight, envelope style, and printing method, see a live price update as each option is selected, upload a reference design or inspiration image, and submit everything as a quote request.
The agents.md names the studio, describes the tool as a live quote calculator with design file upload, specifies a clean and modern aesthetic matching the studio's existing site colors, and notes that the price should update instantly as options change without a page reload. Six sentences of context that every session and every generation will follow.
The first one-shot prompt describes the full feature set: the configurable fields and their options, the pricing logic based on a provided rate table, the image upload field with a file size limit, and the form submission that sends the quote details and uploaded design to the studio's email. A screenshot of the studio's current website goes in as image input so the agent matches the visual style rather than inventing a different one. The agent builds a working first version, and if the pricing logic or the file upload fails on first run, the error screenshot goes back to the same agent with the full session context to fix.
Git commits happen every ten to fifteen minutes. When the tool works correctly in local testing, the repository is pushed to GitHub. Importing the GitHub repository into Vercel and clicking deploy takes approximately twenty seconds. The studio now has a live public URL they can add to their website, their Google Ads campaign landing pages, and their Instagram profile link. The tool is not a generic contact form. It is a custom configured quote system that matches the studio's pricing model exactly, built the same afternoon it was designed.
For any business running paid traffic to a landing page, a tool like this changes the conversion dynamic in a measurable way. A visitor who interacts with a live price calculator and receives a personalized quote is significantly more engaged than a visitor who fills in a name and email and waits for a callback. For studios or service businesses running Meta Ads campaigns, a quote tool on the landing page raises the conversion rate and the quality of the inquiry because the visitor has already committed enough attention to configure their order. The tool also produces structured data, the exact configuration each prospect selected, that makes web CRM follow-up specific and relevant rather than generic.
Push to GitHub, Deploy on Vercel, Live in Twenty Seconds
The deployment step is where most non-technical builders historically got stuck. Hosting providers, domain configuration, SSL certificates, build pipelines, environment variables: each was a separate learning track with its own failure modes. Vercel resolves most of them inside a single import flow.
You push the repository to GitHub. You open Vercel, import the GitHub repository, and click deploy. Vercel reads the repository, detects the framework, runs the build, and produces a public URL. The whole process takes approximately twenty seconds for a small application. The URL is live immediately and reachable by anyone with the link. No hosting configuration. No SSL setup. No deployment pipeline to maintain.
For future updates, the workflow is equally simple. Make the change in the code, commit with git, push to GitHub. Vercel detects the new commit and redeploys automatically. The live URL updates without any manual action beyond the push. A business owner who wants to add a new option to the quote calculator, update the pricing table, or adjust the form layout commits and pushes, and the change is live in seconds.
The sandbox and permission settings in Codex determine how much autonomy the agent has during the build. At the most conservative level, the agent asks for approval before every action. At the most autonomous setting, referred to as yolo mode, the agent runs with maximum autonomy and minimum interruption. For beginners, something between those extremes works best: allow file reads and writes to run automatically but require approval for commands that install packages or modify configuration. That balance keeps the build moving quickly while preserving oversight over the changes that are hardest to reverse.
The Real Barrier Is Now Clarity of Idea, Not Technical Knowledge
For any business owner evaluating whether to build a custom web tool, the primary question has changed. The technical barrier that used to be the main obstacle is now the smallest one. The barrier that determines results is the clarity of the idea.
A clear, specific description of what the tool does, who uses it, what it shows, and what happens when the user interacts with it produces a working application through Codex. A vague description, one that leaves the agent to guess at the intent, produces a vague application that does not quite do what was imagined and requires extensive revision.
The sequence is install, write agents.md, build with good context including image input and web search where useful, commit with git every fifteen minutes, push to GitHub, and deploy on Vercel. Every step in that sequence is achievable by a complete beginner on their first attempt if the idea is clear enough to describe specifically. The under-an-hour claim is accurate for a builder who follows that sequence with a concrete idea and does not skip the agents.md setup.
For businesses that are already generating organic traffic through SEO content or through paid search campaigns, a custom tool on the website adds an interactive conversion layer that static pages cannot provide. The visitor who uses your tool and receives a personalized output is further along in their decision than the visitor who read your content and left. Building that tool now takes an afternoon, not a month.
That is exactly what we do at AI DOERS. Book a private 30-minute call with Madhuranjan Kumar and we will map the fastest path to it for your specific business.
Book your call →
Madhuranjan Kumar
Madhuranjan Kumar brings 20 years of performance-marketing experience and has managed over $200 million in Facebook ad spend for brands across the United States and beyond. His expertise spans the full modern marketing stack: Meta, Google Ads, TikTok, email automation, CRM, and the websites that hold it together. At AI DOERS he turns that track record into lead-generation systems for businesses across every industry.